Designing a Patch
Before creating a design for a patch, determine the patch’s intended use. This will influence details such as size, border, and backing.
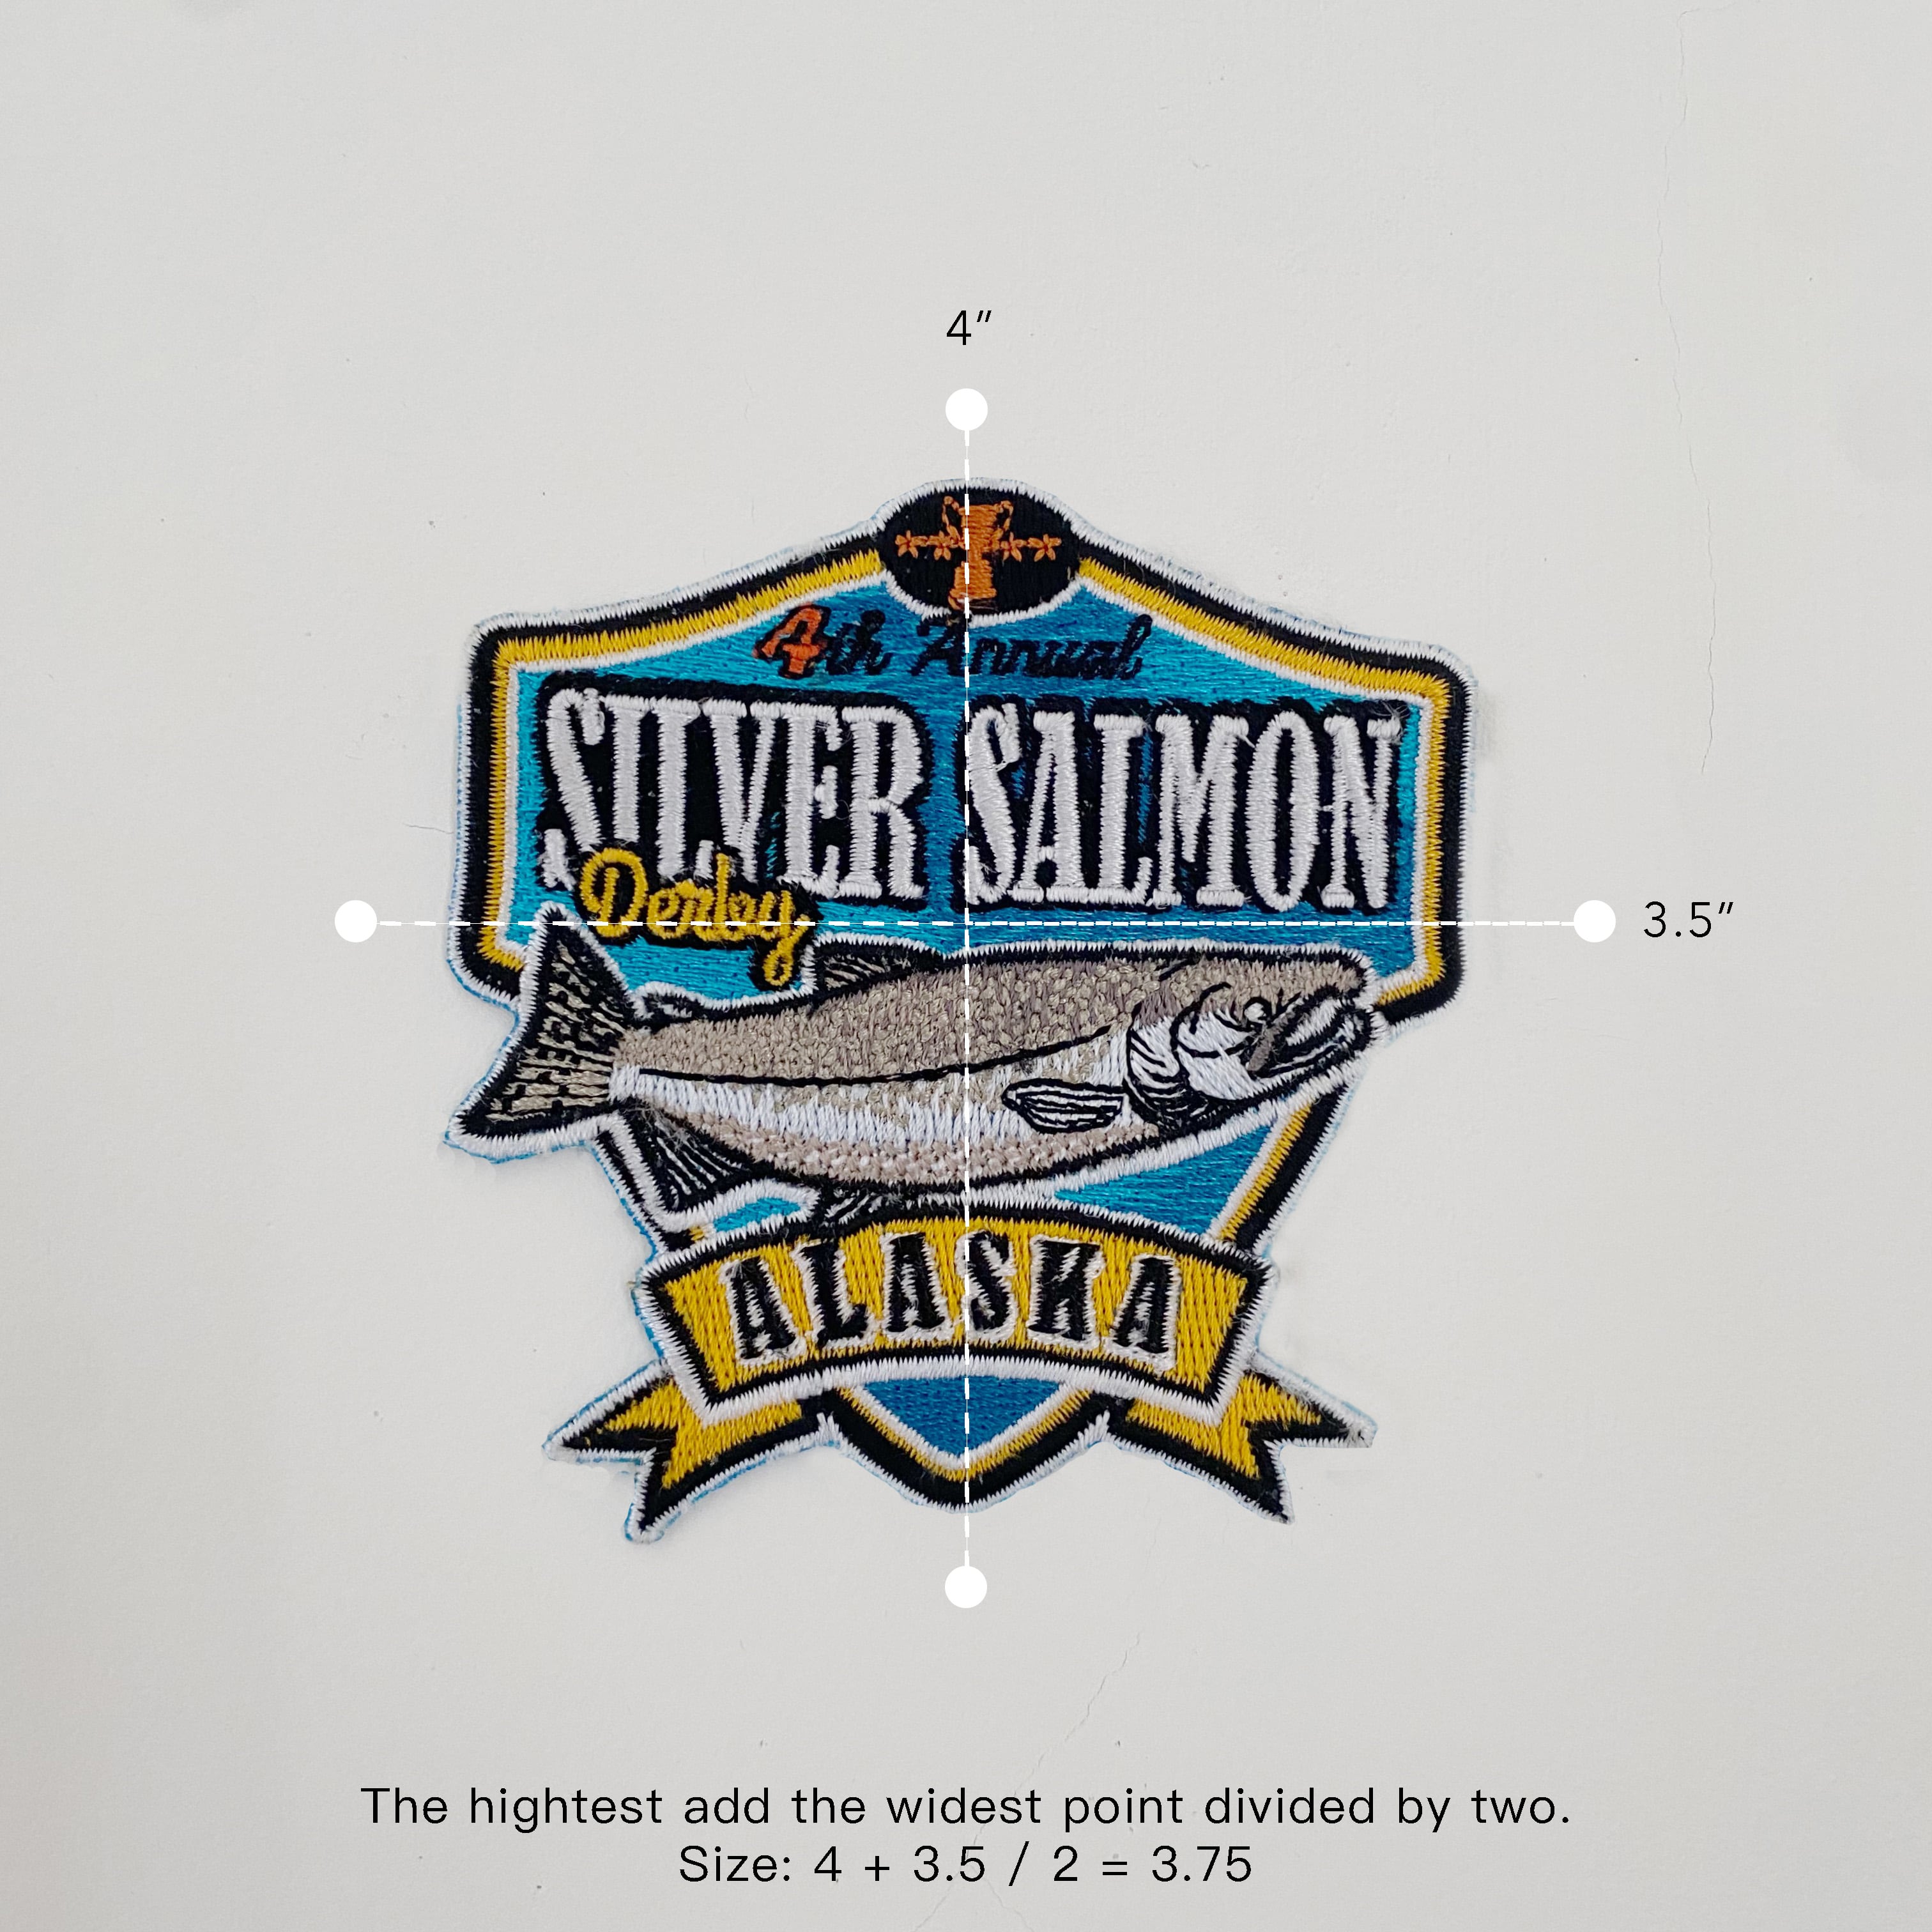
1. Size
For most patches, the size typically ranges from 3” to 5” for hats, clothing, and decorative items. To learn how to measure your design correctly, refer to this article: Measuring Your Design.
2. Border
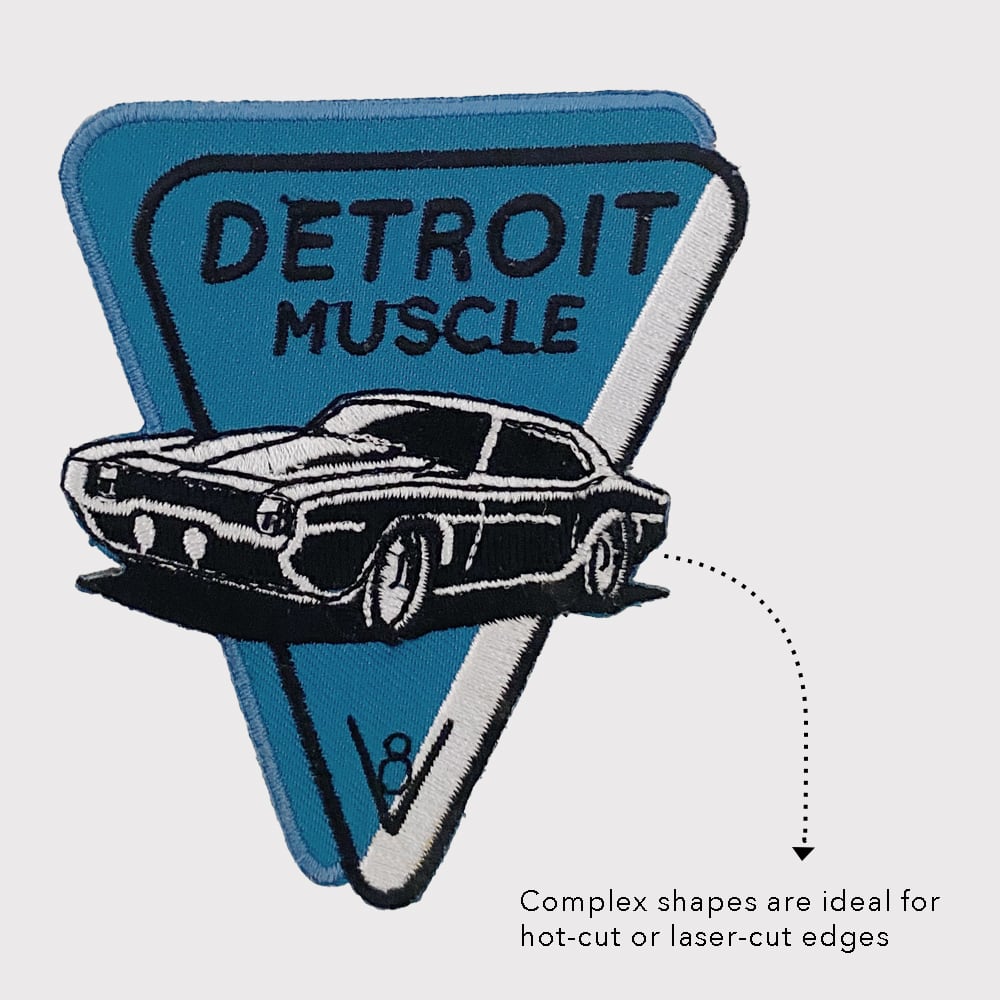
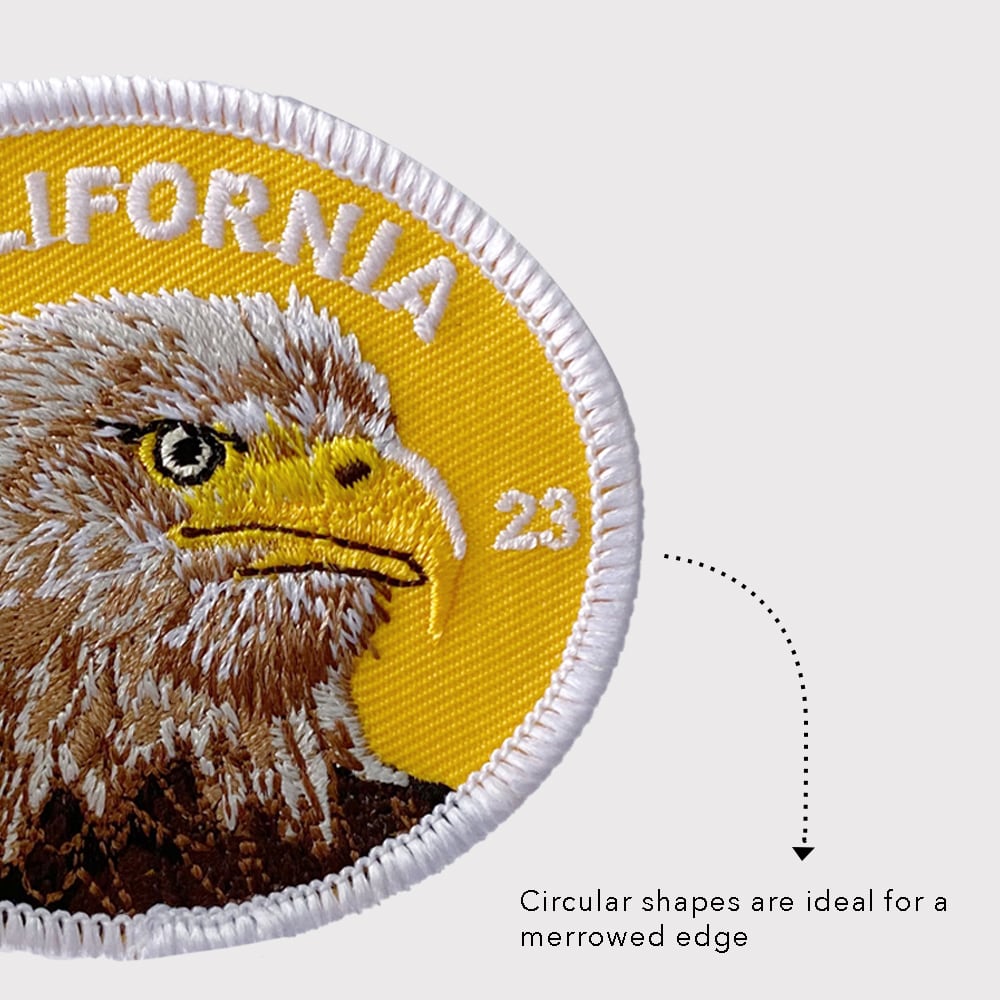
A suitable border can enhance your design and make it stand out. Different design shapes are suitable for specific types of borders.
Here are some basic guidelines for border options: (1) Complex Shapes: Hot-Cut or Laser-Cut Border
(2) Circular & Square Shapes: Merrowed Border
3. Backing
The backing is a crucial element of your design as it determines how you can attach the patch to your garments.
(1) Patches for Clothing, Hats, and Jackets
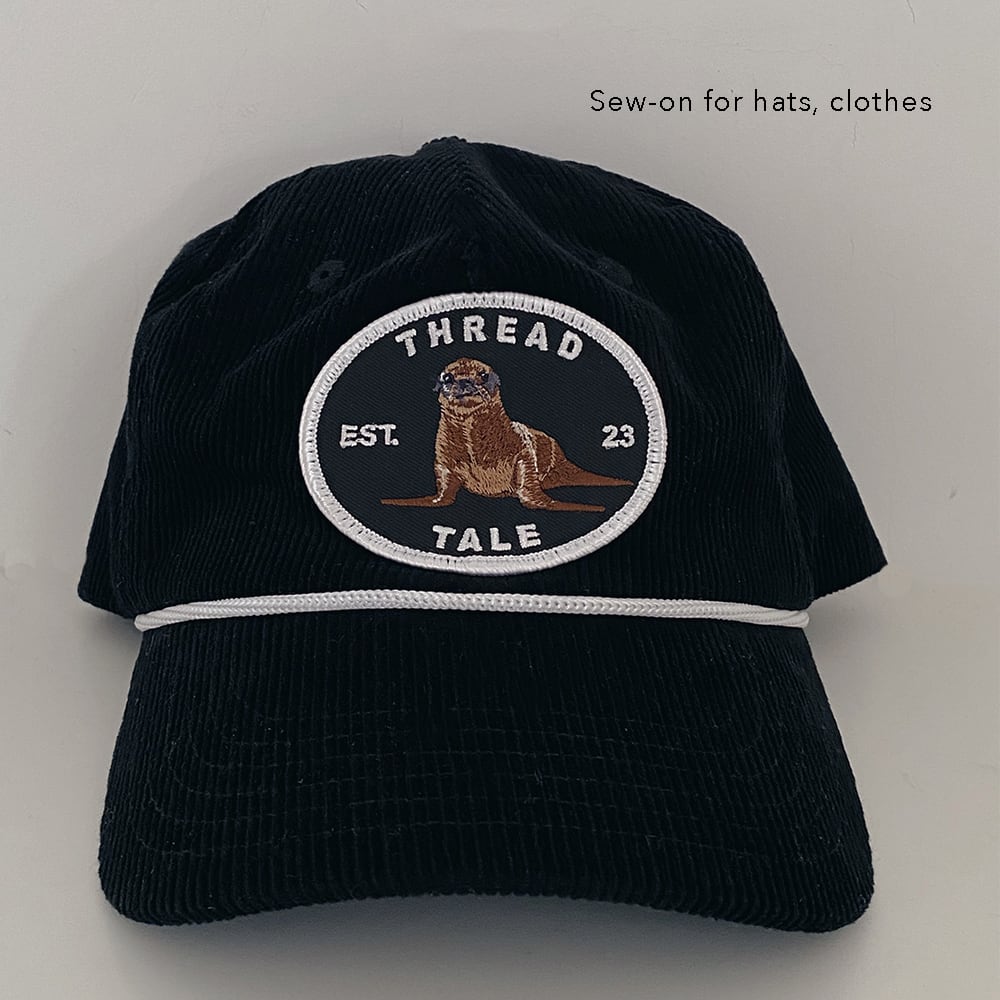
- Iron-On: This allows you to easily permanently attach the patch to any surface by using an iron.
- Sew-On: These patches are intended for sewing onto different surfaces, adding support and giving your patch a stiffer look while helping it maintain its shape.
(2) Patches for Backpacks, Uniforms, and Tactical Gear
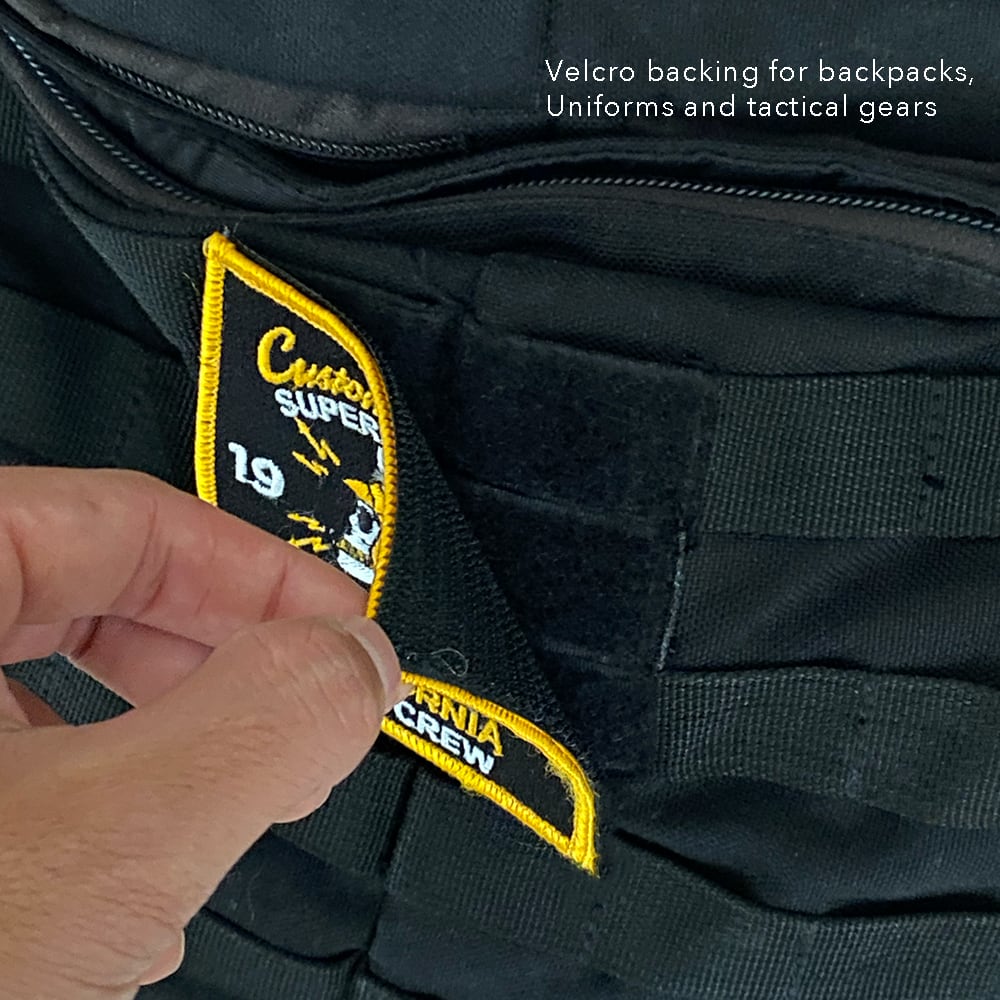
Velcro (Hook-And-Loop): Velcro patches offer versatility, allowing easy removal and application on a variety of garments.
Design File Format
We accept JPG, PNG, and Photoshop files. We will help you digitize your design and turn it into a patch.